How to Use Antigravity CLI (agy): Install, Commands, and Multiple Sessions
agy command. This guide is the practical walkthrough: what Antigravity CLI actually is, how to install it on macOS, Linux, and Windows, the commands you will use every day, and how it picks up your old Gemini config on the first run.
Antigravity CLI is a single compiled binary with no Node or Python runtime to manage, and it ships eight models in the same terminal instead of one. It is also multi-agent by default, so a single agy session dispatches and coordinates its own sub-agents inside a task rather than running as one linear chat.
By the end you will be comfortable using Antigravity CLI on its own, and you will know how to run several independent agy sessions in parallel when one terminal stops being enough.What is Antigravity CLI?
Antigravity CLI is Google's official command-line coding agent, invoked with the agy command. It is the direct successor to Gemini CLI. Google announced the transition on the Google Developers Blog, retired Gemini CLI on June 18, 2026, and pointed everyone to Antigravity from there on. If you have an old gemini install lying around, it is end of life. agy is what you use now.
Three things make Antigravity CLI different from the tool it replaces, and they are worth understanding before you install it.
One binary, no runtime
Antigravity CLI ships as a single compiled binary. There is no Node.js or Python to install first, no version mismatch to chase, no global npm package to keep updated. You drop in one executable and run it. That alone removes most of the setup pain people had with the old CLI.
Eight models in one terminal
Where Gemini CLI gave you Gemini, Antigravity CLI puts eight models behind the same command: the Gemini 3.x family, Claude Sonnet 4.6, Claude Opus 4.6, and GPT-OSS 120B. It defaults to Gemini 3.5 Flash and auto-selects the right model for the work, so there is no --model flag to memorize. Having more models in one CLI is the headline change, and it means you rarely have to leave agy to reach for a different model.
Multi-agent by default
A single agy session is not a single linear chat. By default it dispatches and coordinates sub-agents within a task, breaking the work into pieces and managing them itself. You give it a goal and it organizes the steps under the hood. That is a real shift from the one-thread mental model most CLIs use.
Multi-agent inside one task is different from running several sessions at once. agy coordinates its own sub-agents for the job in front of it. When you want to work on several independent projects or tasks at the same time, you run several independent agy sessions in parallel, which is exactly what an AI CLI agent swarm is about. More on that in the last section.
How to install Antigravity CLI
Installing Antigravity CLI is a one-line job on every platform. Because it is a single binary, there is no runtime to set up first.
macOS and Linux
Run the official install script from your terminal. It downloads the binary, puts it on your PATH, and you are done.
curl -fsSL https://antigravity.google/cli/install.sh | bashWhen it finishes, open a new terminal and run agy to confirm it is on your PATH. The first launch handles sign-in and, if you had Gemini CLI before, offers to bring your old config across (covered in the next section).
Windows
On Windows, use the PowerShell installer. It pulls the binary and installs it under %LOCALAPPDATA%, no admin rights or extra runtime required.
irm https://antigravity.google/cli/install.ps1 | iexOpen a fresh PowerShell or terminal window afterward so the updated PATH is picked up, then run agy to start.
No Node, no Python, no package manager. If you have scripts or CI that still install Gemini CLI through npm, that path is dead. Swap it for the install script above and call agy instead of gemini.
First launch and migrating from Gemini CLI
The first time you run agy, it signs you in with your Google account and then checks for an existing Gemini CLI setup. Antigravity reuses the same ~/.gemini home directory, so it knows exactly where to look.
If ~/.gemini exists, agy offers to import your old configuration automatically. That includes your MCP servers, your allowed-without-confirmation commands, your keybindings, and your theme. Accept the prompt and your familiar setup carries over without you re-entering anything.
Where the config lives
~/.gemini- the shared home directory Antigravity reuses, so your existing data and history are right where you left them~/.gemini/GEMINI.md- your global instructions file, read on every session, the same way the old CLI used it~/.gemini/antigravity-cli/settings.json- the Antigravity CLI settings file, where the agy-specific configuration is stored
Because GEMINI.md is still the global instructions file, any project conventions or persona you wrote for Gemini CLI keep working under agy with zero changes. Drop your rules there and every session reads them.
If you never used Gemini CLI, there is nothing to migrate. agy just signs you in and starts fresh, and you can add a ~/.gemini/GEMINI.md later whenever you want global instructions.
Essential Antigravity CLI commands
You can do almost everything with a handful of commands and flags. Here are the ones worth knowing from day one.
# Start a new session in the current project
agy

# Continue your last conversation
agy -c

# Resume a specific conversation by id
agy --conversation <id>

# Turbo mode: auto-approve actions, no confirmation prompts
agy --dangerously-skip-permissions
Starting and resuming sessions
Plain agy starts a new session in whatever directory you are in. agy -c picks up your most recent conversation right where it ended, which is the one you will reach for most. When you have several conversations and want a specific older one, agy --conversation <id> resumes it by id.
Turbo mode (skip permissions)
The --dangerously-skip-permissions flag is the turbo, auto-approve mode. agy stops asking for confirmation and just runs. It is the fastest way to work, and it is exactly as risky as the name says, so use it on trusted tasks where you are happy for the agent to act without a checkpoint on every step.
Model selection is automatic
You do not pass a model flag. agy defaults to Gemini 3.5 Flash and auto-selects from its eight models based on the task. That keeps the command short and means you do not have to decide between Gemini, Claude Sonnet 4.6, Claude Opus 4.6, or GPT-OSS 120B on every run.
MCP servers
Antigravity CLI supports MCP servers, and if you imported your Gemini CLI config they are already wired in. They live in your settings file, so adding a new one is a matter of editing the JSON.
// ~/.gemini/antigravity-cli/settings.json
{
  "mcpServers": {
    "my-server": {
      "command": "npx",
      "args": ["-y", "@my/mcp-server"]
    }
  }
}
Once a server is in the settings file, agy connects to it on the next session and its tools become available inside the agent. This is the same MCP model the old CLI used, which is why the import brings your servers across untouched.
Running multiple Antigravity CLI sessions in parallel
One agy session coordinates sub-agents for the task in front of it. But often you want to push on several fronts at once: a feature in one project, a bug fix in another, docs in a third. Each of those is its own agy session, its own process, with its own conversation and context. Running them at the same time is where a visual workspace earns its place.
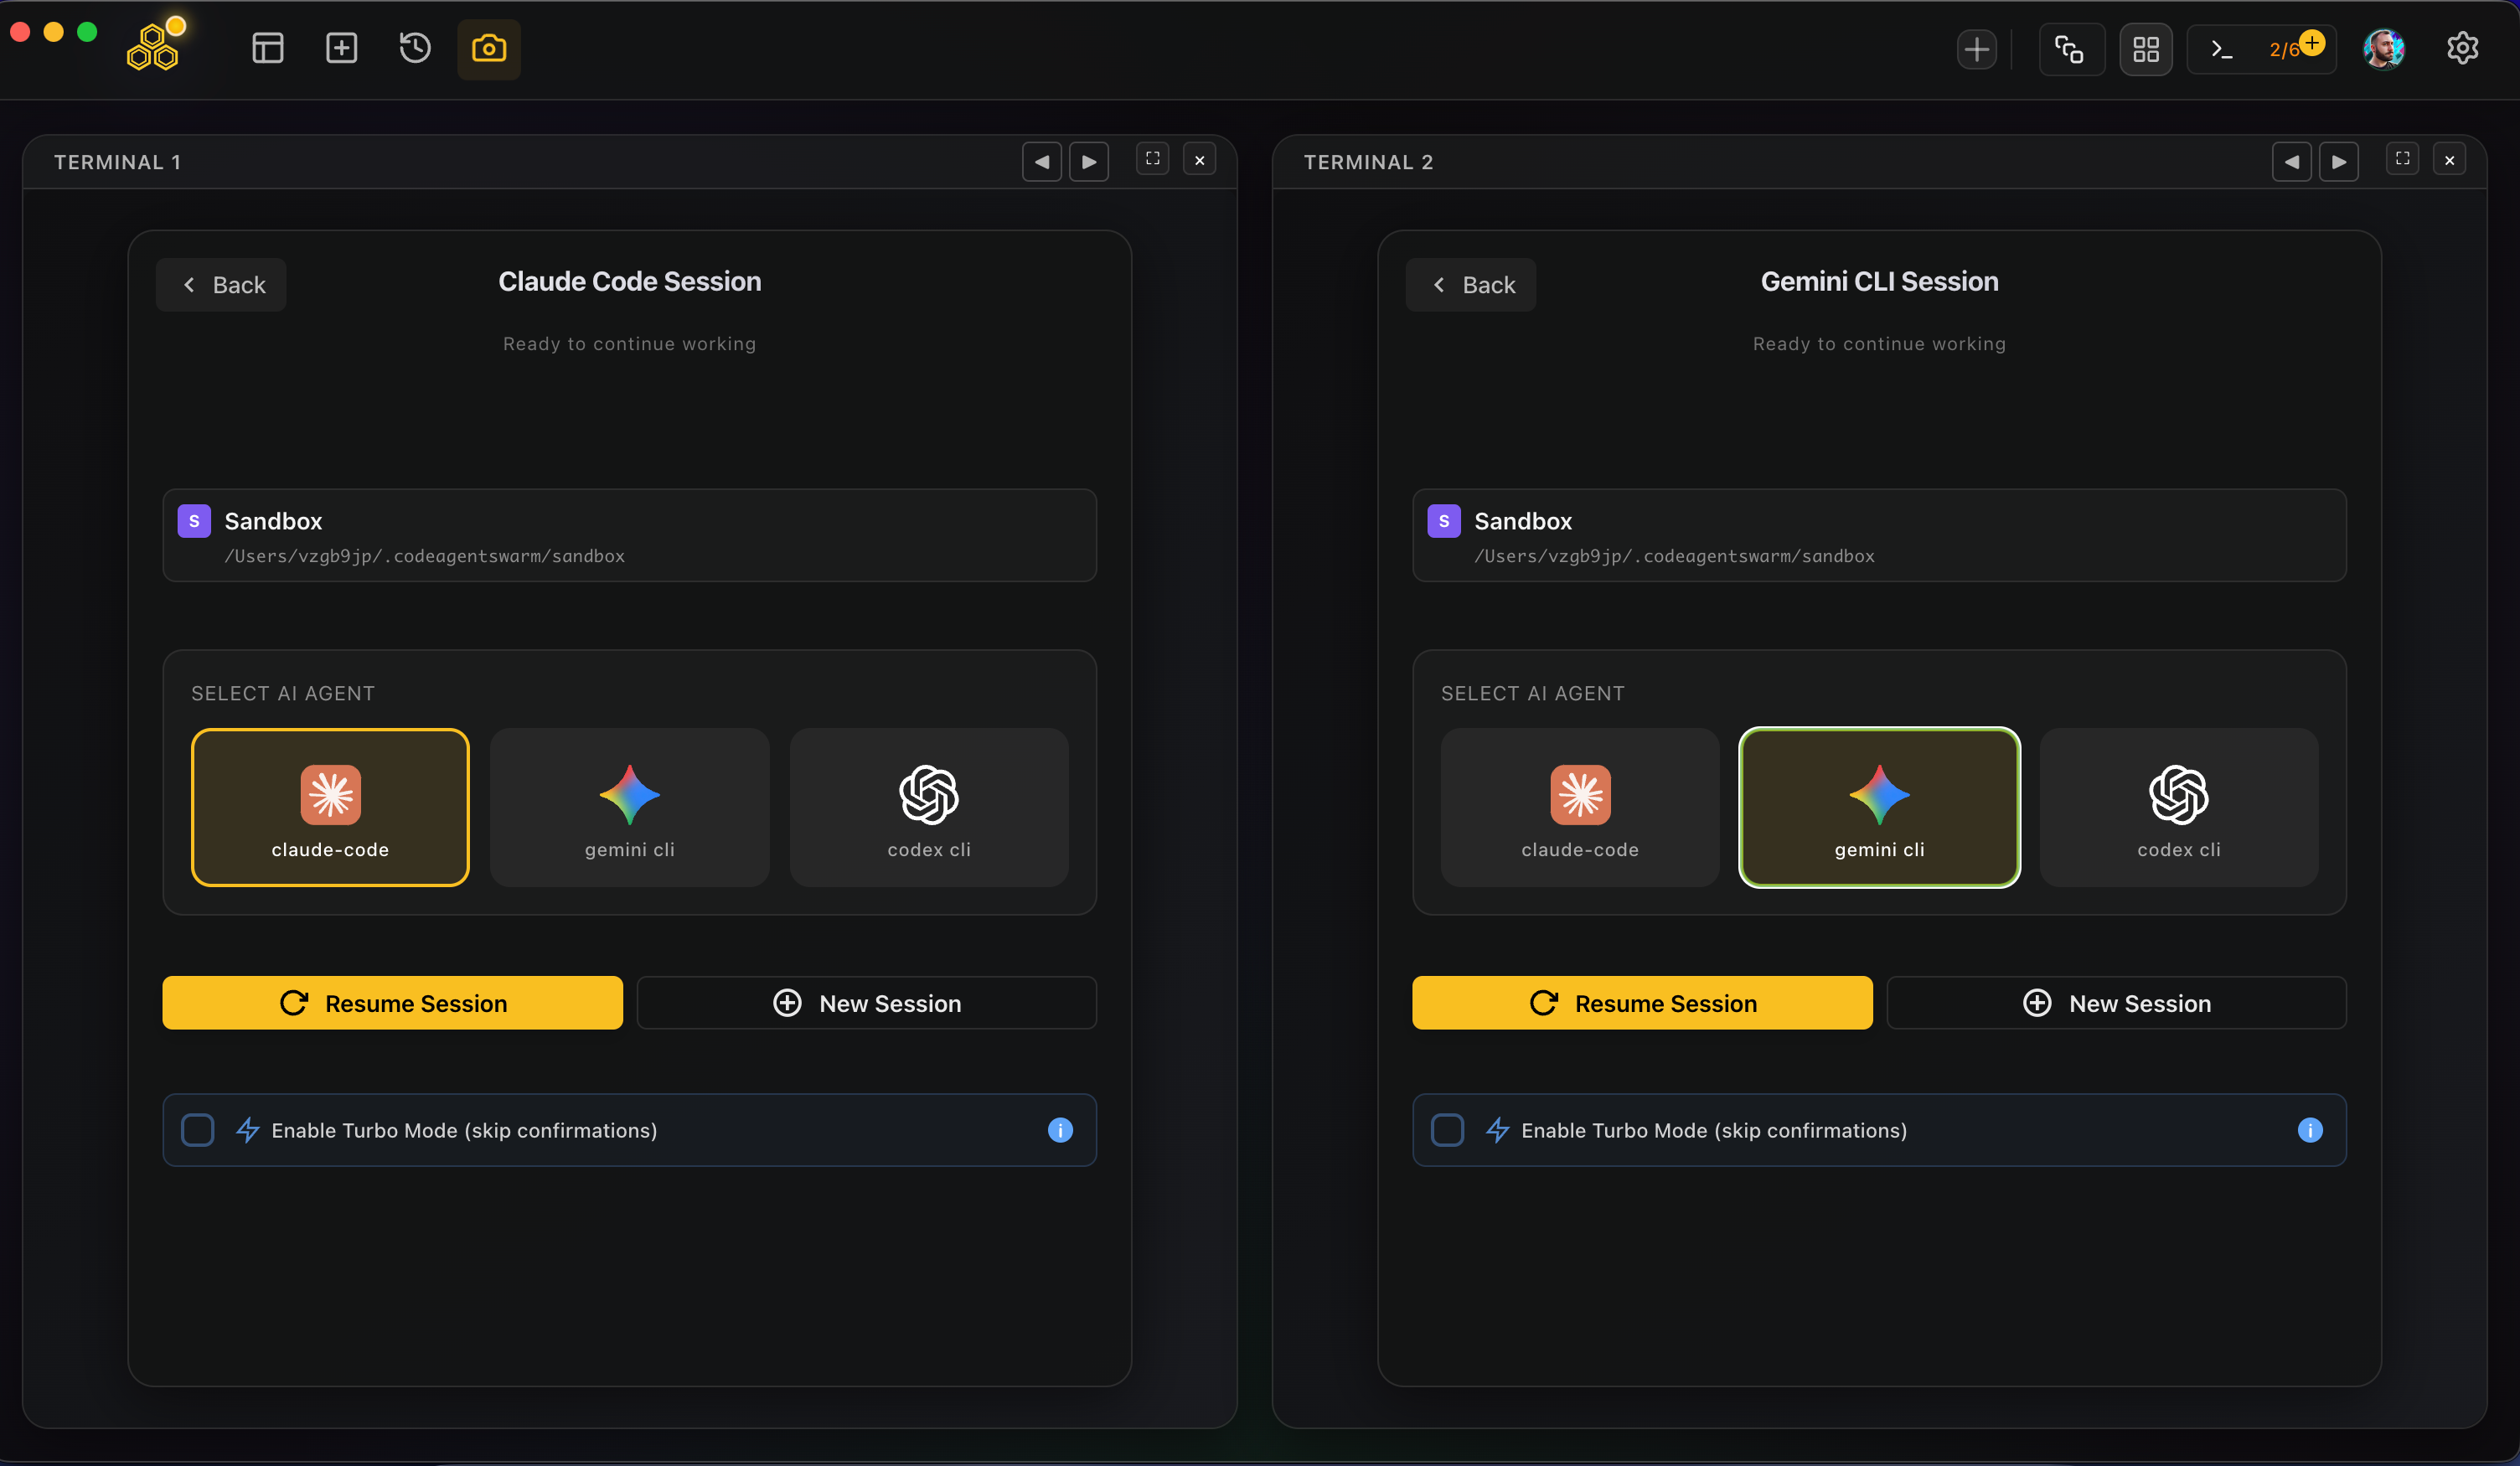
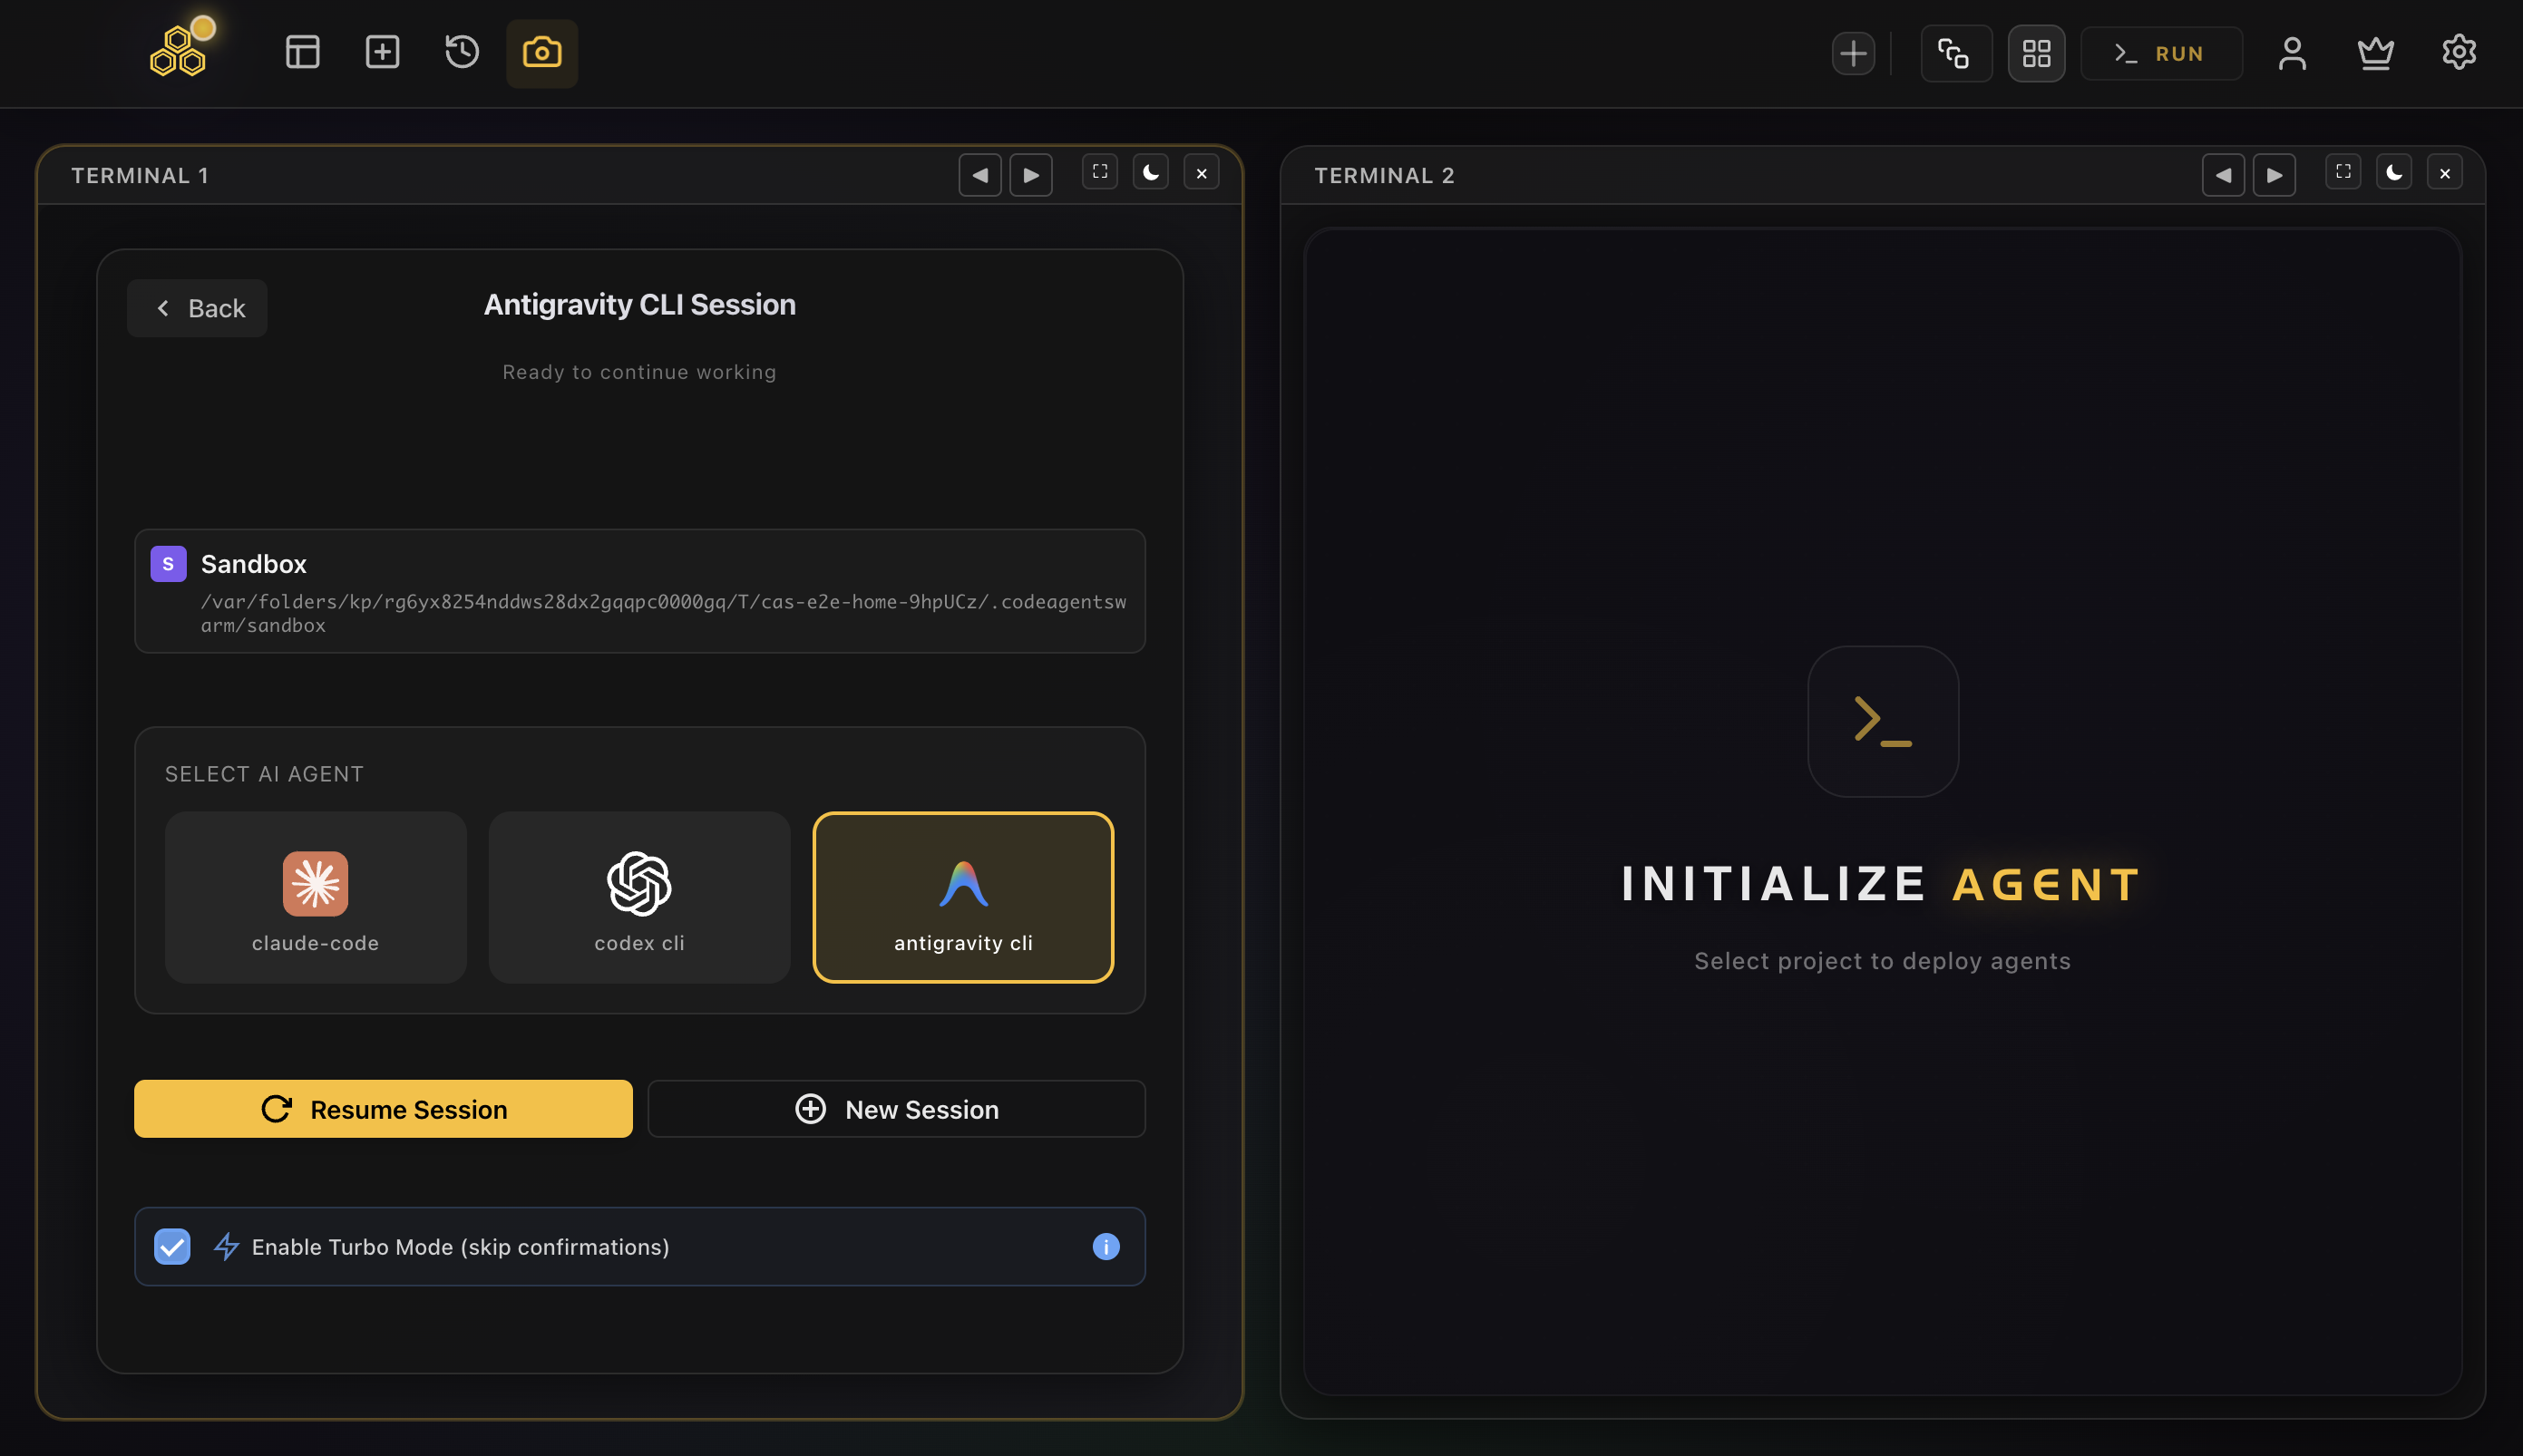
CodeAgentSwarm is a desktop app for macOS and Windows built for exactly this. It gives you multiple terminals in one window, and in the SELECT AI AGENT picker you choose the agent per terminal: claude-code, codex cli, or antigravity. Set several terminals to antigravity and you have a control room for parallel agy sessions, all in one place.
CodeAgentSwarm is not a model provider. Each agy session keeps using your own Google sign-in and your own Antigravity install. The app just gives the sessions a home and adds the things that matter once you are running more than one:
- Per-terminal dynamic titles, so instead of identical "agy" tabs you see what each session is actually doing right now
- Desktop notifications the moment a session finishes or stops to ask you something, so you stop babysitting tabs (more in the notifications guide)
- Searchable conversation history across every session, so you can trace what any agy session did and resume it later (see the conversation history guide)
- A kanban board your sessions update themselves over MCP, keeping the big picture in one view
- Turbo Mode with granular permissions, so a session moves fast on safe operations while risky ones stay gated (see the Turbo Mode guide)
- Per-terminal live file diffs, so overlapping edits between sessions never surprise you (see the real-time changes guide)
For the step-by-step on running several agy sessions at once, see running multiple Antigravity CLI sessions. If you are still deciding whether to move off the old tool, Antigravity CLI vs Gemini CLI lays out exactly what changed. And because antigravity sits next to Claude Code and Codex CLI in the same picker, the same workspace also runs multiple Claude Code sessions and multiple Codex sessions when a task fits one of them better.
Start with one agy session to get a feel for the multi-agent behavior. When you find yourself wanting a second and a third going at once, open them as separate terminals in CodeAgentSwarm and let the dynamic titles and notifications keep you oriented. The agent swarm concept guide covers the workflow that grew out of the old Gemini CLI and applies just as well to agy.
FAQ
Antigravity CLI is Google's official command-line coding agent, run with the agy command. It is the direct successor to Gemini CLI, which Google retired in June 2026. agy ships as a single compiled binary, includes eight models in one terminal, and is multi-agent by default, meaning one session coordinates its own sub-agents within a task.
On macOS and Linux, run curl -fsSL https://antigravity.google/cli/install.sh | bash. On Windows, run the PowerShell installer with irm https://antigravity.google/cli/install.ps1 | iex, which installs it under %LOCALAPPDATA%. It is a single binary, so there is no Node or Python runtime to set up first. Open a new terminal afterward and run agy to start.
Yes. You sign in with a Google account and get a generous free tier. CodeAgentSwarm does not change that, since it is not a model provider. Each agy session keeps using your own Google sign-in, whether you run one session or several in parallel.
Yes. Google retired Gemini CLI on June 18, 2026 and replaced it with Antigravity CLI, as announced on the Google Developers Blog. agy reuses the same ~/.gemini home directory and reads global instructions from ~/.gemini/GEMINI.md, so your old config and conventions carry over. On first launch it even offers to import your Gemini CLI MCP servers, allowed commands, keybindings, and theme.
Antigravity CLI gives you eight models in the same terminal: the Gemini 3.x family, Claude Sonnet 4.6, Claude Opus 4.6, and GPT-OSS 120B. It defaults to Gemini 3.5 Flash and auto-selects the right model for the task, so there is no --model flag to manage.
Each agy session is an independent process, so you can open several at the same time, one per project or task. The cleanest way is CodeAgentSwarm, a desktop app where you set each terminal to antigravity in the SELECT AI AGENT picker and get dynamic titles, desktop notifications, and searchable history across all of them in one workspace.
Yes. Windows is supported through a PowerShell installer that places the binary under %LOCALAPPDATA% with no admin rights or extra runtime needed. CodeAgentSwarm also runs on Windows, so you can run multiple agy sessions in parallel there in the same visual workspace.
Run multiple Antigravity CLI sessions in one CodeAgentSwarm workspace, each on its own project, with desktop notifications the moment a session finishes and searchable history across all of them.
Try CodeAgentSwarm